Build a New Workflow
Create a new workflow
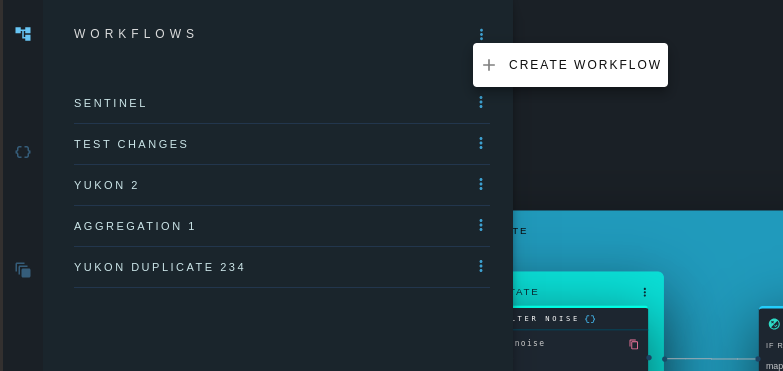
Click on the options menu in the workflows panel, and select "Create Workflow".
Enter a name and (optionally) a description for the workflow and click "Create Workflow"
States can now be added to the new workflow.
Workflow versions
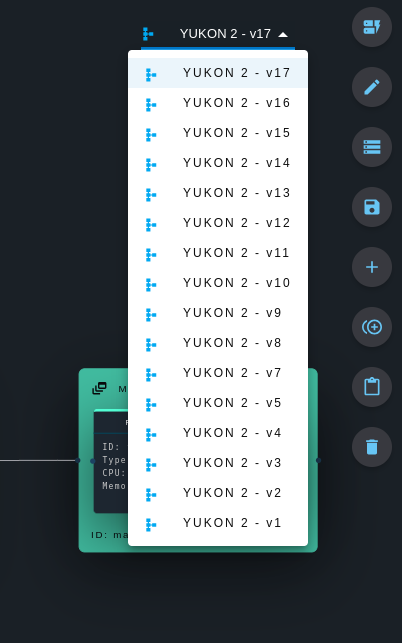
Workflows are always versioned, e.g., My New Workflow - v10. If a user executes a certain workflow version, and then switches to edit mode and makes changes to the workflow, the version number is incremented automatically. Changes cannot be made to a workflow version once it has been executed, so that the state of the executed workflow is always preserved for future reference.
Users may also create new workflow versions by clicking the increment icon on the right-hand side. Users can select a previous workflow version in the dropdown menu located in the top right corner, and execute the version. Once a previous verion is seleted, users can create a new version based off of the selected previous version by clicking on the increment button on the right-hand side.
Versions may also be deleted via the delete icon on the right-hand side.
Add a state to the workflow
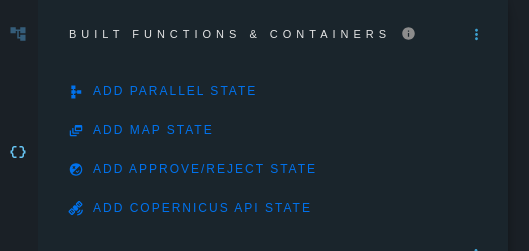
Click on the edit icon on the right-hand side and then in the Built Tasks panel, click the options menu for the desired state and then "Add to Current Workflow".
The State will appear in the Workflow. Drag and drop the state to the desired position, and use the connectors to connect the state to other states.
Delete a state from the workflow
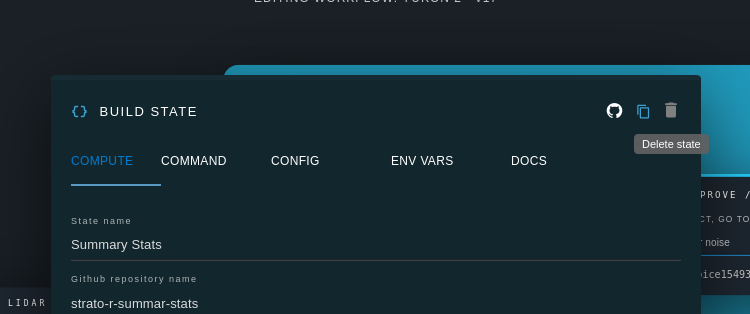
Double-click on a state to open the state options modal. Click the delete icon in the top right corner and confirm deletion. Deleting a state from a workflow does not delete the underlying function/container, which will still be available for use elsewhere.
Add a parallel state to the workflow
Parellel states allow multiple branches of states to run at the same time. This is useful for cases where certain branches of a workflow are not dependent on each other, and can therefore run simultaneously to reduce execution duration.
In the Built States panel, click the Add Parallel State Button.
Drag and drop the state to the desired position and resize the state as desired. Drag and drop other states inside of the parallel state and make connections, in order to construct multiple branches of states.
The parallel state itself can also be connected to other nodes in the workflow.
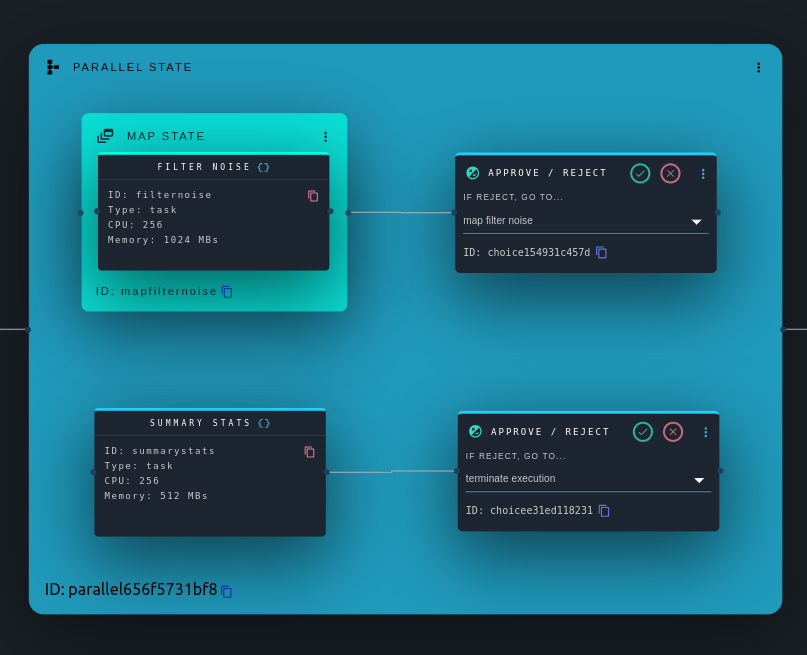
Add a map state to the workflow
Map states allow for parallel processing of large datasets. For example, 1000 files which need to be processed by the same dockerized algorithm can be processed simultaneously on 1000 different compute instances. The result is a dramatic decrease in processing time.
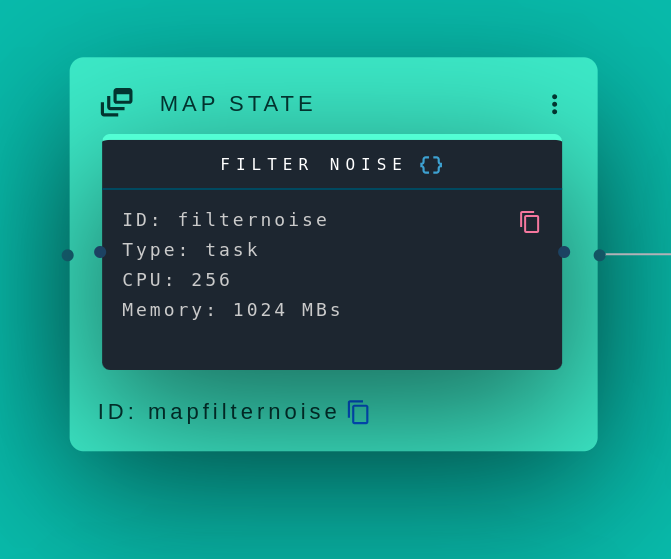
In the Built States panel, click "Add map state to workflow". Double-click the map state to set the Elastic File System directory, S3 key or previous state name where the input files are located. Optionally set a file type so that only files with the specified extension are consumed by the map state.

Add a function or container to the workflow and position it inside of the map state. The environment variable ITEM_DATA will be available for use in your function/container. Each of the individual items passed into the function/container by the map state is accessible as the ITEM_DATA environment variable.
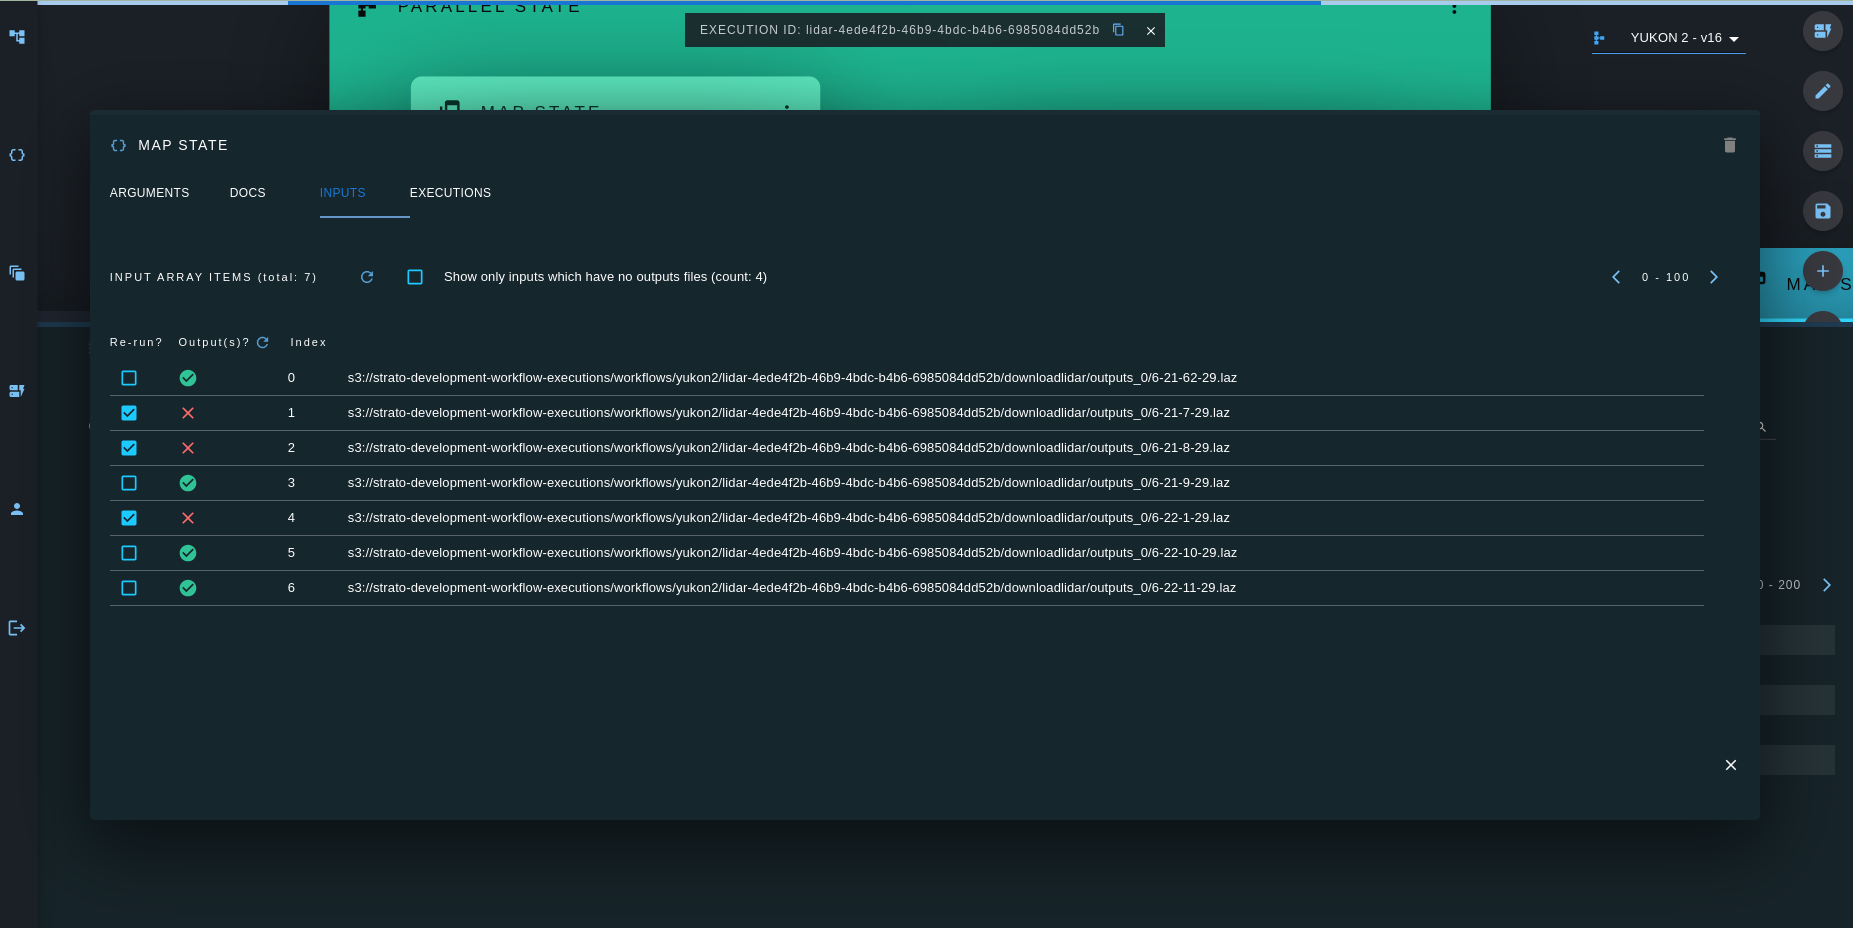
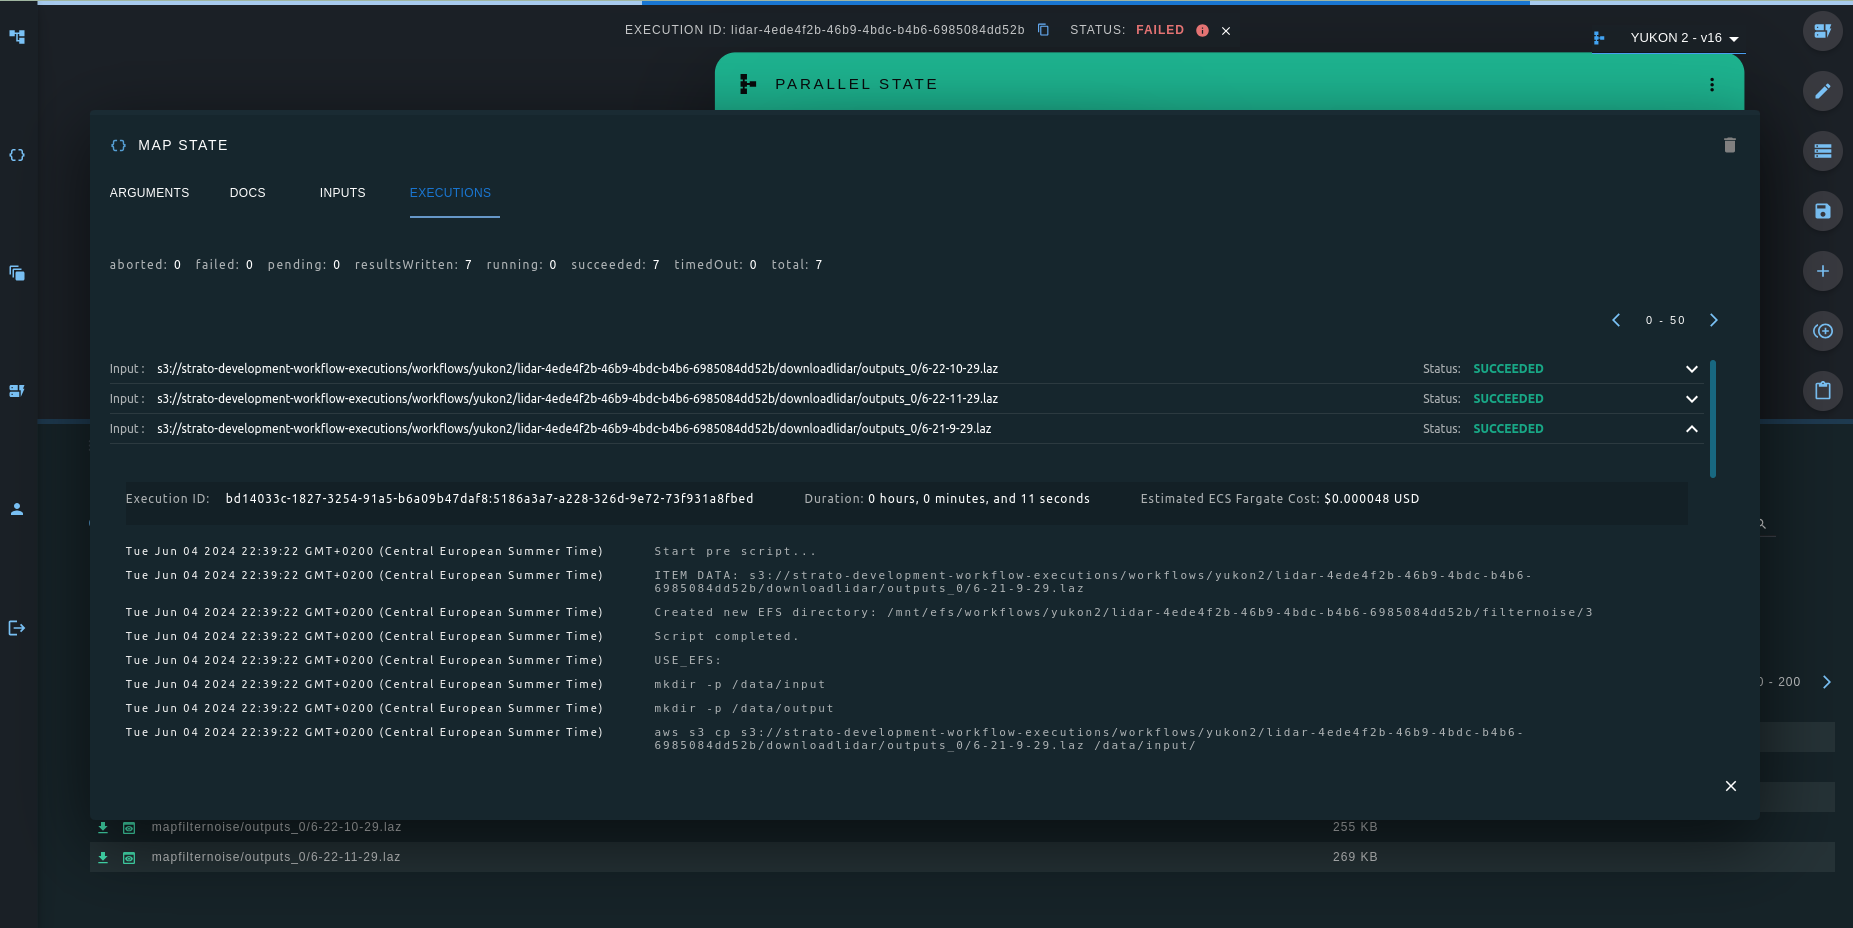
Upon execution, double click the map state to see the list of selected from your specified EFS directory/s3 key for processing.
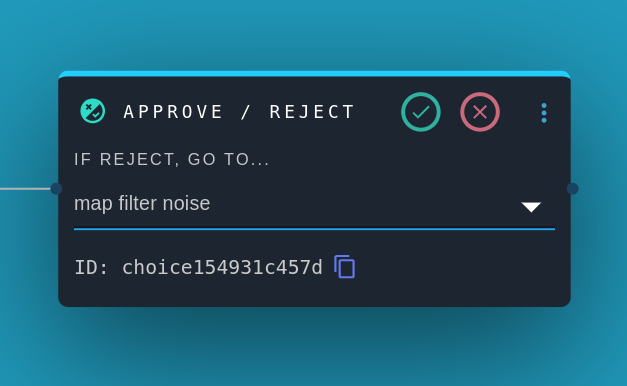
Add a choice state to a workflow
When a workflow arrives at a choice state during execution, the execution is paused until a user clicks the choice state's approve or reject button. This allows users to inspect the results of previous states before deciding whether to proceed with the execution. Users may click "reject" to loop back to and re-run a previous state. Before rejecting to re-run to a previous state, users may change state config values or push a code update to the branch of repository which the state is based on.
Copy & Paste an Existing State
Use the copy & paste functionality to copy an existing state (and its arguments and configuration) and paste into the same workflow or a different workflow.
Double click on a state to open the edit modal, and click the copy icon at the top right.
Open the target workflow, and click the paste icon on the right-hand side.
